Landscape astrophotography with IRIS
14 November 2015. Comments .Оглавление #
Introduction #
On the web:
-
Lots of manuals are available on registering and stacking telescopic images. Why do people stack lots of frames to obtain only one final picture? First of all, in order to reduce the digital noise.
-
Lots of manuals on landscape astrophoto with usual DSLR and usual lenses. As a rule, stacking is not described in such manuals.
This post aims to teach how to apply the power of image stacking and noise reduction to a landscape astrophotography with ordinary DSLR. Wide-field astrophotography has its own features: rotating sky and motionless landscape are present in the frame. Astronomers who shoot the sky do not face this problem, hence usually people don’t talk about it. I’ll do.
The post is for: photographers who is familiar with RAW, who knows how to use masks in GIMP or Photoshop. For those who have already tried night photography, who have been charmed by the night photography and crave more. Probably it is not the best idea to start learning how to shoot night photos with this post; first try something less complicated.
Necessary equipment: camera, shooting in Raw; lens; tripod; computer with Windows OS.
Higly recommended to have: remote control (I use wired PiXeL TC-252 N3 with Canon 6D) or smartphone application for remote control.
What you will do: choose the place with excellent starry sky; shoot 30–50 frames with right parameters; register and stack frames in free software IRIS; complete in photo editor like Photoshop or GIMP.
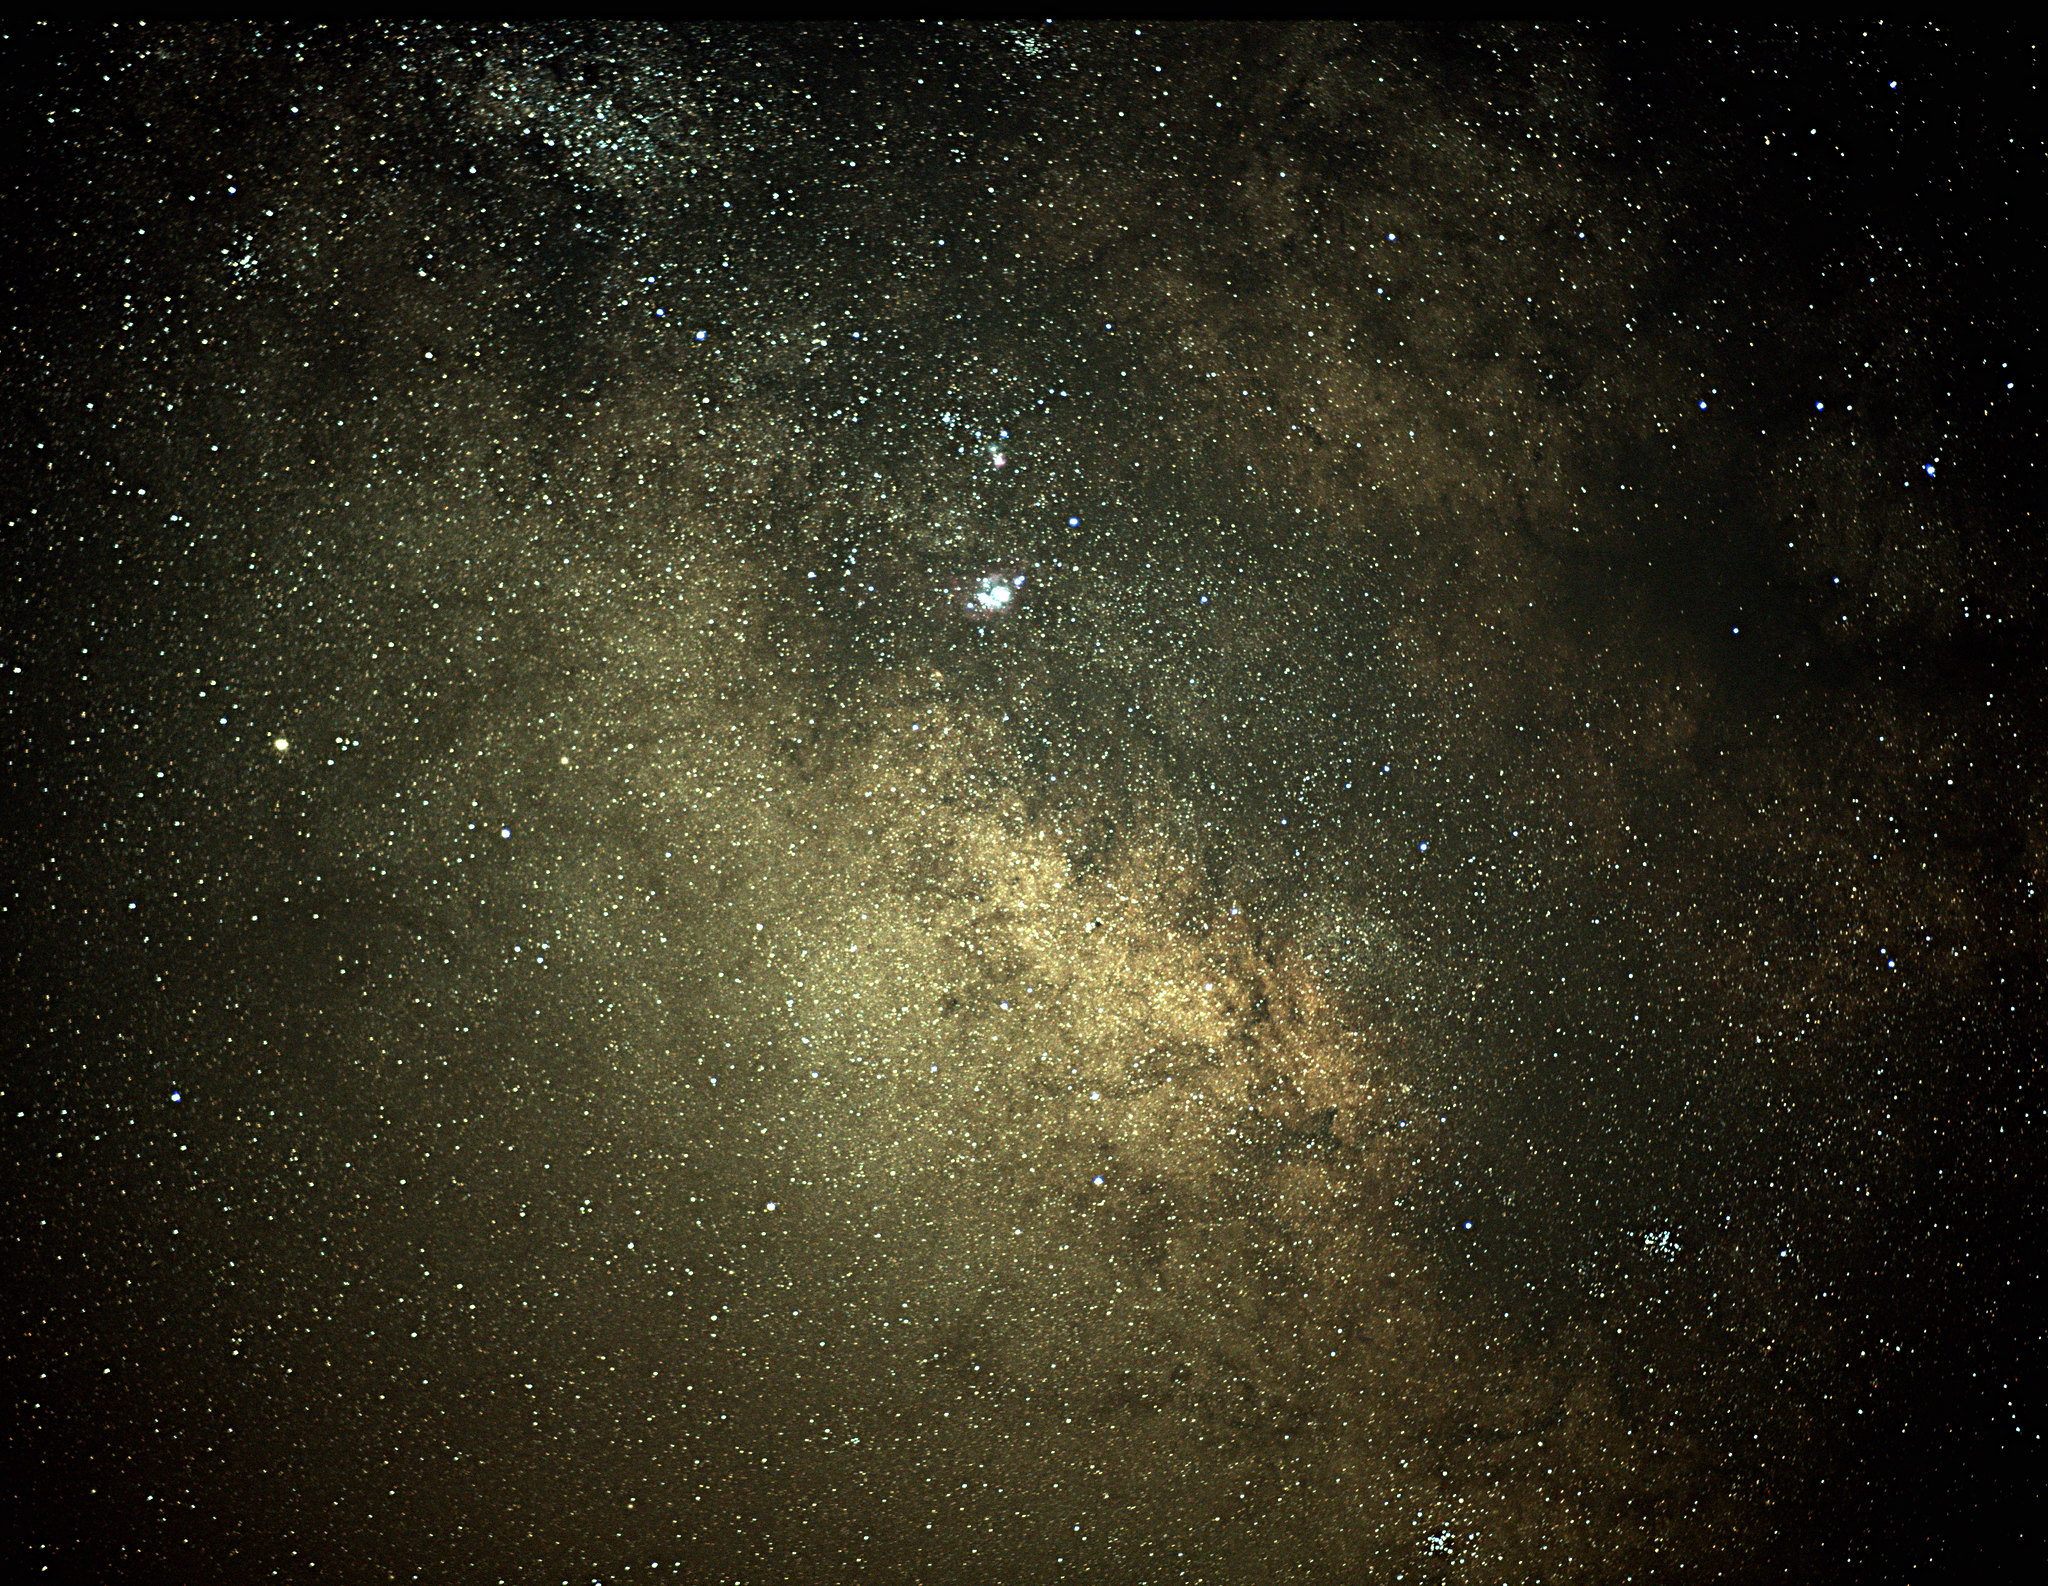
I decided to write this a post after I got the following picture (click and hit F button for bigger size):
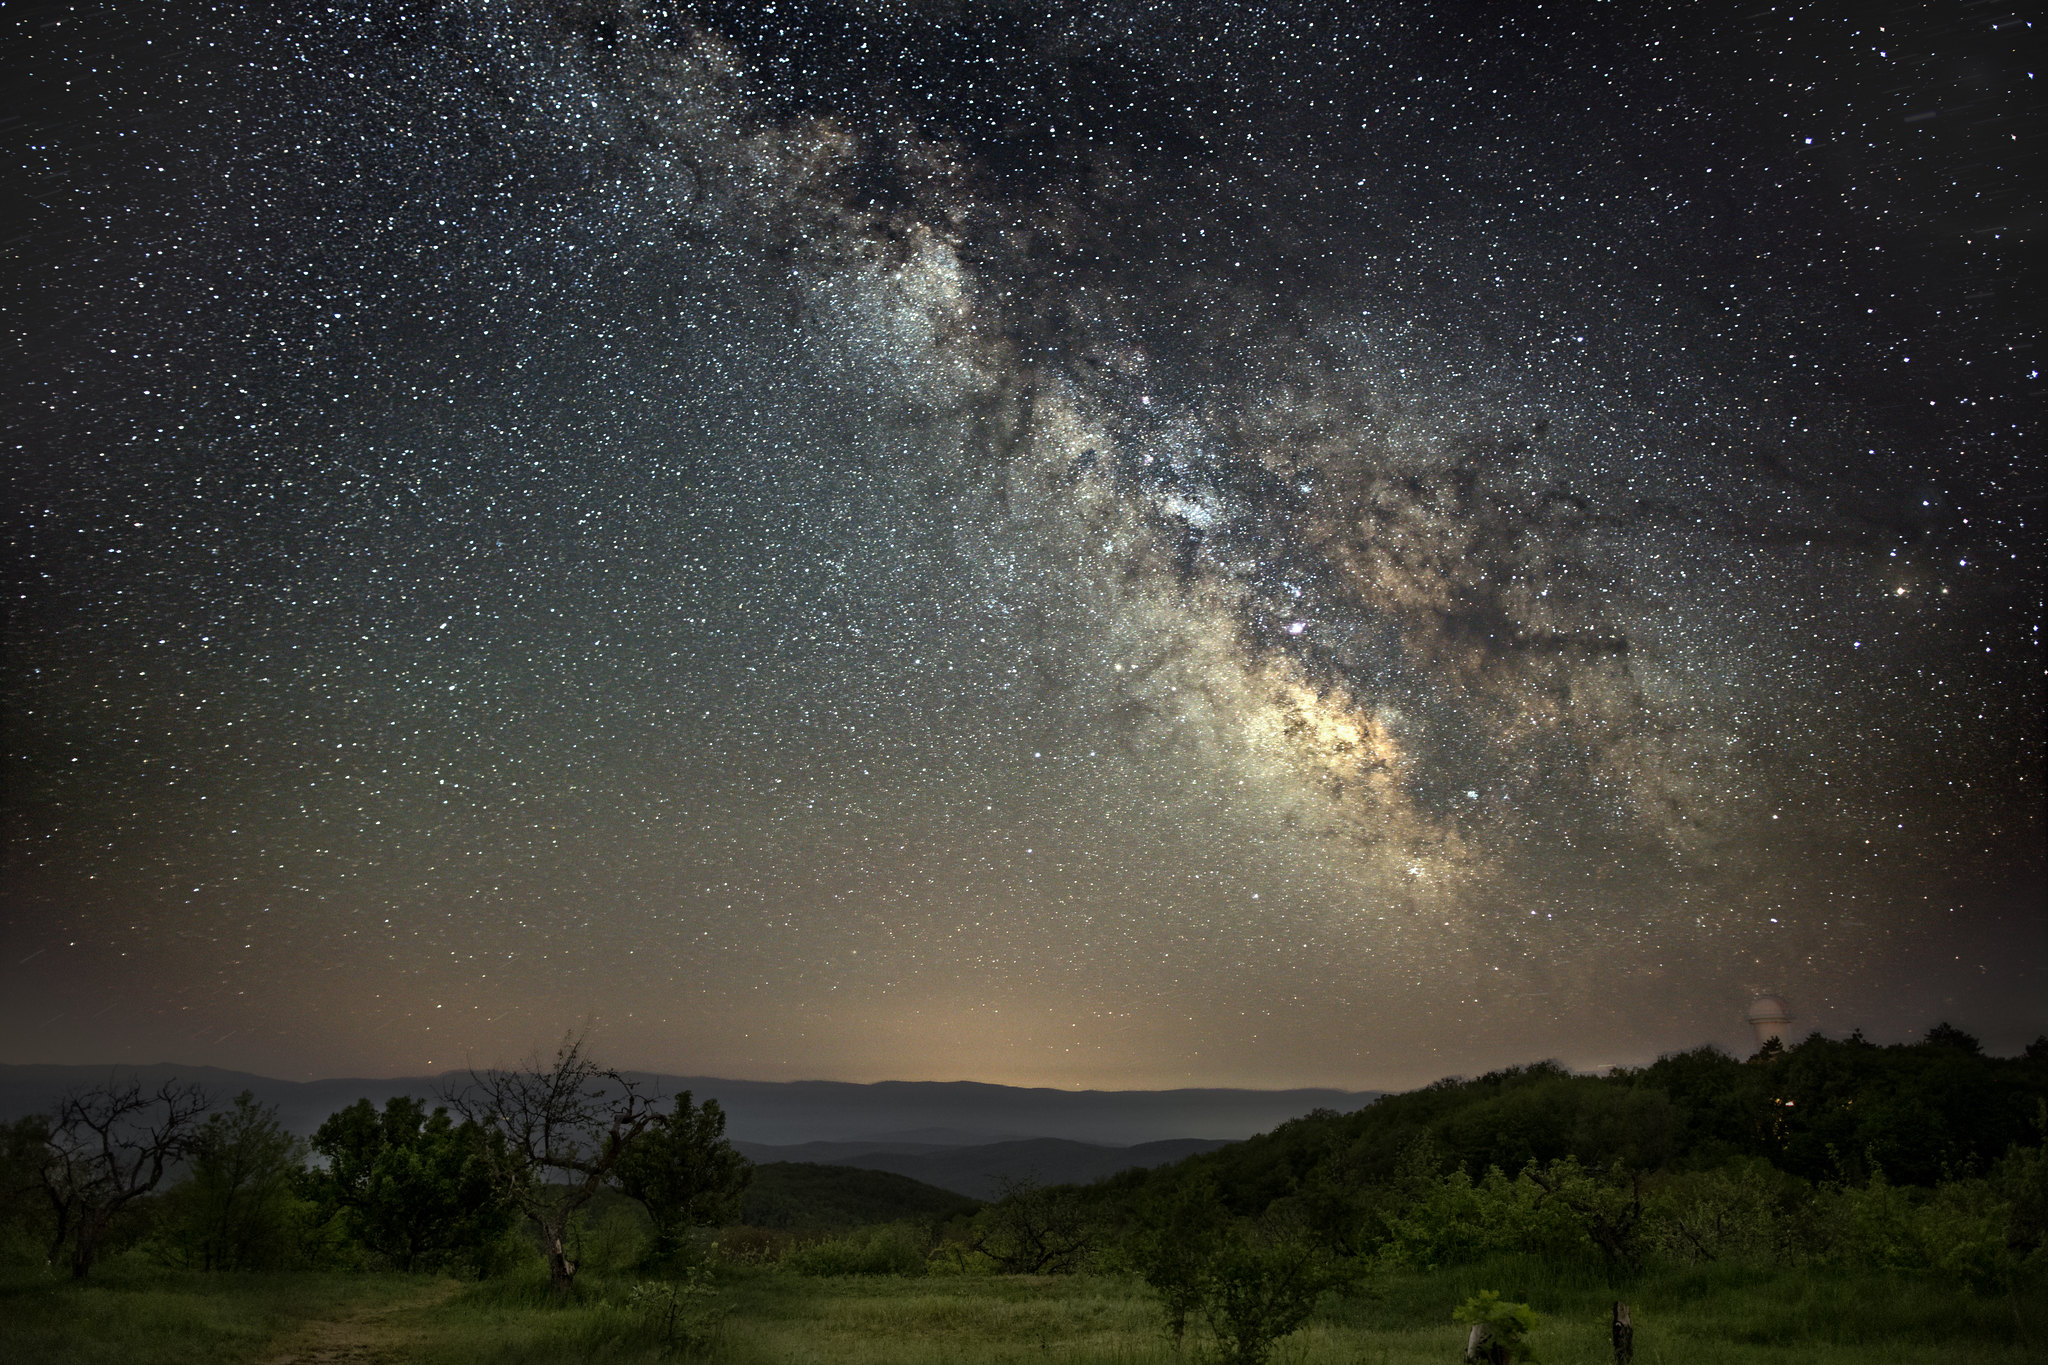
Canon 6D + Canon 24mm f/1.4L II @f/2.5; ISO 16000; 15 frames × 15 sec; darks, offsets.
This image is created using 46 frames. The reason why do people stack images is demonstrated by the following animation. In the animation I compare two frames: one obtained with 15 stacked frames, and the other is just one frame, processed in LightRoom.
15 кадров means 15 frames; 1 кадр means 1 frame. I am sorry but I’m too lazy to redo the animation.
The difference in faint details is just tremendous. It’s not surprising: when you reduce noise for the single frame, computer cannot distinguish between the noise and the faint star. And that is from where the main idea of stacking images stems. Digital noise on your CCD/CMOS basically is a random signal. That means that the certain pixel in one frame is highlighted with the noise and in the other frame it isn’t. On the contrary, any star always stays in the same position (of course, after registering pictures to take the Earth’s rotation into account). That’s why the signal of the star after stacking will increase and the noise will decrease. Single-to-noise enhancement is a fundamental task for astronomers, and similar techniques is being used to process images from all the professional observatories in the world.
Here is a link to all the images which have been used to create the photo «Crimean way». You can download all the files and use them to follow the steps in this manual. Try to make the best of the single image and compare it with the result after stacking the images.
Shooting: theory #
Basic info #
-
The most important: sky should be really good. In the cities or close it is useless to shoot the stars. The sky itself is too bright, because it reflects city’s illumination. Lots of dust above your head block the light from the faint stars. The photo «Crimean way» is obtained from the very good place — Crimean Astrophysical Observatory (CrAO). Milky Way was easily visible with the naked eye. With a typical suburban sky I’d not be able to obtain such a nice result. The further from the cities and the higher to the mountains you are — the less the light pollution is and the less atmosphere is above you. I’d like to emphasize: the choice of location is much more important than the price of your camera.
-
Shoot in RAW, all camera built-in noise reduction functions must be OFF. We’ll reduce noise much better then camera can do it with a single frame. Built-in noise reduction will extinguish not only noise but also faint stars. We want to avoid it.
-
IRIS is developed for stacking telescopic images, that’s why it can behave strangely when both landscape and sky are present in the frame. The less landscape in the frame, the easier it is to work for IRIS. A compromise — smooth horizon without trees and other standing out objects. Trees will be blurred and then it will be much more difficult to use masks in GIMP/Photoshop.
-
Stars should not move during exposure. For instance, with FF camera and 24 mm lens ~15 seconds is maximum time exposure.
-
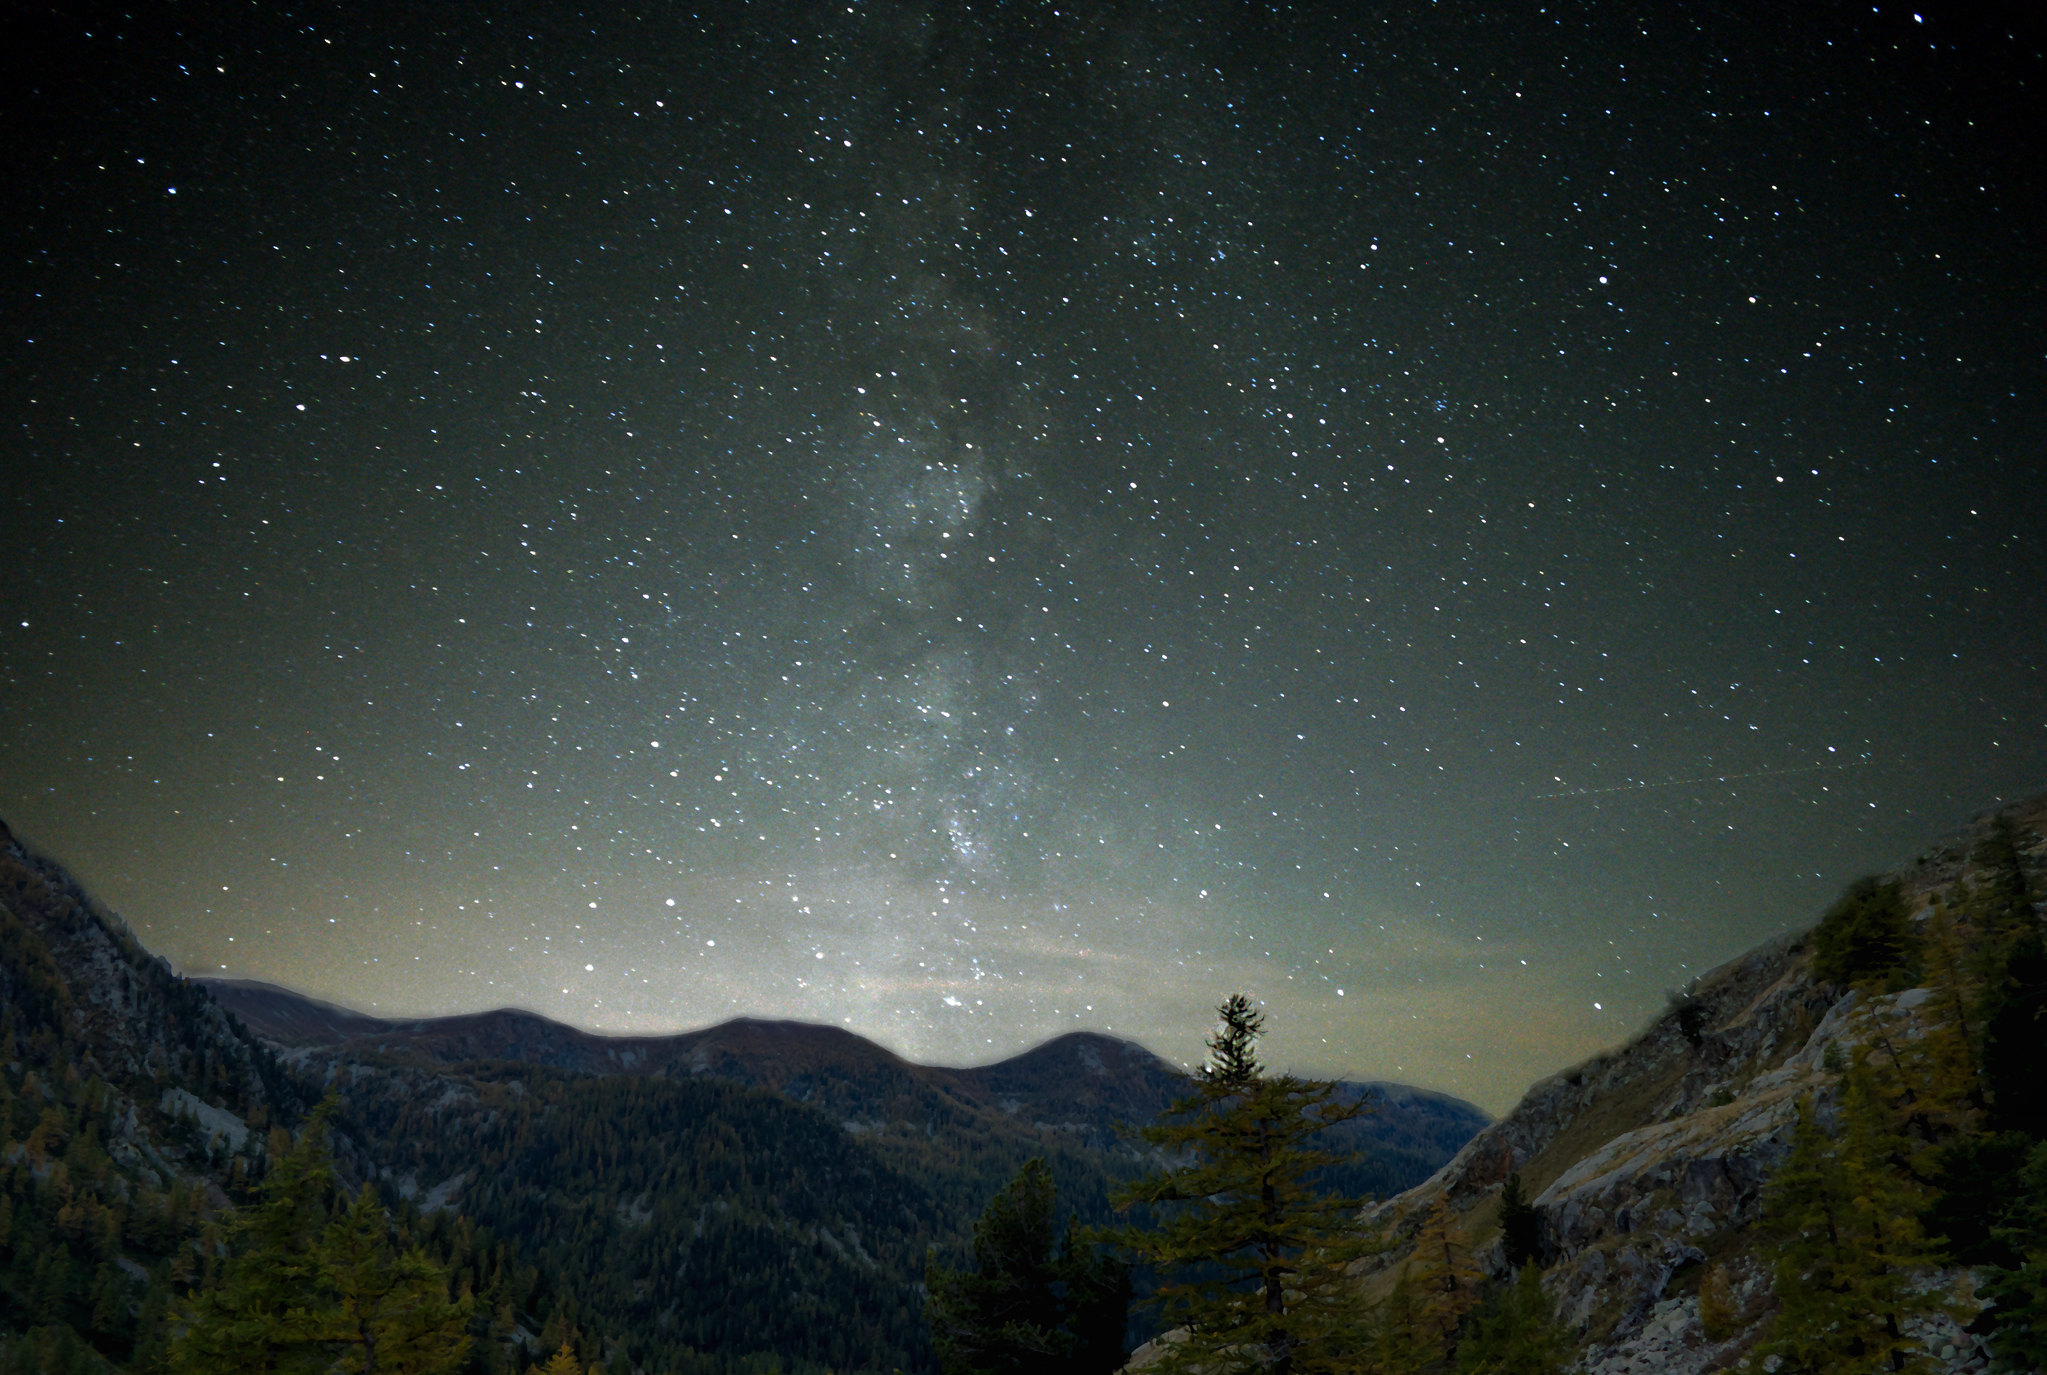
Your single frame might be «noisier» than what you want to have after processing. Don’t worry, the final result will be much better. E.g., for «Crimean way» I used ISO 16000, time exposure 15 sec and aperture f/2.5 with Canon 6D + Canon L 24 mm. Why didn’t I use the widest possible aperture (f/1.4)? Because ISO 16000 is fine with Canon 6D, and f/2.5 allows to avoid chromatic aberration which results in blue and orange haloes around the stars. Even ISO 25600 may be a good choice: see my photo (Canon 6D + Samyang 8mm f/2.8 @ f/3.5; ISO 25600, 12 frames × 30 sec). Not the best composition, but the quality of the sky is decent.
-
Check out moonrise and moonset time. Don’t forget that with bright Moon Milky Way will be almost invisible. Sky brightness will be brighter than faint parts of MW and you won’t see lots of details. It may be very convenient if Moon rises soon after you finished sky imaging. Don’t move the camera, wait for some time and then, when Moon is high enough to lighten the landscape, shoot the landscape. It happened like this when I was shooting «Crimean way». It worth noticing that beautiful, well lit and properly exposed landscape is very important for the artistic merit of the result. Maybe even more important than a sky — good sky is always the same if you shoot it right.
Series of frames to shoot #
-
Ligths: ~10 similar usual frames with equal delay between them. From my own experience, delays should be as short and as equal as possible. Otherwise IRIS may not succeed in registering images. Remote control allows you easily to shoot such series. In Canon 550D there is a function to shot up to 10 frames in automatic mode with predefined parameters. With this function in most cases you don’t need any remote control.
These
lights— the most important thing, of course! All other series (darks, offset, flat) will improve the quality of the picture just insignificantly, while just stacking rightlightseries will almost eliminate the noise.Before this series I make around 10 frames varying ISO, exposure time and aperture to understand which parameters work better.
-
Darks: 10 frames with same parameters, but with the cap on lens. No real photons should reach your sensor so cover not only the lens but also a viewfinder. Canons, for instance, have a rubber cover on the strap for it.
Shoot these frames in the same temperature as the
lightseries. Noise, produced on sensor, depends on temperature. These frames will be used to understand which signal is produced by the sensor (obviously, if there is no real signal, all the rest is just noise). IRIS will subtract this signal from the image. -
Offset (bias): 10 frames with minimal exposure time (for DSLR it is usually 1/4000 or 1/8000 sec). These frames allow to get rid of the offset current, which occurs when signal is being read from the sensor.
-
Flat: flat-field frames. People, operating telescopes (focal distance is high), often use twilight sky to shoot this frame. With wide-field lens it is quite complicated to get a flat-field frame. I’ve never done it. But it is very helpful — it allows to get rid of vignetting and local desensitizations due to dust on the sensor.
The importance of dark and offset series #
I wondered: is it really important to shoot dark and offset frames for our purposes? Without thinking twice I’ve made a comparison (perhaps it is not perfectly correct but still it provides some idea of dark and offset series importance). Animation shows 2 images: 15 stacked frames with subtracted darks and offsets and just 15 stacked light frames.

15 кадров + dark&offset means 15 frames with dark&offset;
15 кадров, без dark&offset means 15 frames without dark&offset. I am sorry but I’m too lazy to redo this animation.
It turned out that for 15 frames there is almost no difference. Maybe it will work differently for a lower amount of frames.
Shooting: practice #
Procedure #
What I’ve done to shoot the «Crimean way»:
-
Came to the place with amazing night sky.
-
Attached camera to a tripod, attached a remote control. Turned off autofocus and achieved an infinity focus by trial and error, checking stars’ sharpness on the LCD screen.
-
Made a dozen of trial photos to understand which ISO, time exposure and aperture I want to use. The aim is to use the longest time exposure for which the stars don’t leave tracks yet. The wide aperture usually is not the best choice:
- vignetting is high (which significantly spoils any astrophoto)
- chromatic aberration is high
- sharpness is low, especially in the corners
-
Chose the composition of the frame. After this point you can’t move the camera, it’s better even not to touch it. It is really important, otherwise registering may fail.
-
Shot 15 frames with 1 second delay between them (the lowest possible) via remote control. This is
lightseries. -
Covered the lens and the viewfinder with caps and shot 15 frames again with the same parameters. This is
darkseries. We need it to subtract the «dark current», the random noise which is generated on sensor even without any real light. -
Changed only time exposure (from 15 sec to 1/4000 sec) and made 15 frames again. This is
offset(or bias) series. We need it to subtract the noise appearing when reading the image from the sensor. -
Without touching the camera, I shot the landscape (ISO 3200, time exposure ~200 sec). Of course, if in your case Moon sets when you begin shooting, shoot the landscape first.
Shooting tips #
-
Be prepared that your first attempt will fail. My first attempts to do something like this weren’t impressive.
-
For the first time try to shoot only sky without a landscape with narrow field of view, then it will be much more simple for IRIS to register images.
-
Don’t try to shoot stars in the megalopolis from your balcony. Just try to shoot the sky in the big city with ISO 16000, time exposure 15 sec and f/2.5 — you’ll probably get the overexposed image. Sky is too bright in the cities.
-
When finished with all the series (or before all the series), don’t touch the camera. Make one more shot for the landscape, using lower ISO and longer time exposure (e.g., ISO 3200 and time exposure 3 min).
-
Don’t always seek for an ideal infinity focus. Sometimes slightly blurred stars looks even better.
-
For some reason I thought that the wider the angle, the better for the landscape astrophotography. I bought Samyang 14mm f/2.8. It turned out that Milky Way doesn’t look so majestically with such a wide angle; also the stars in the corners are stretched into lines. Now I think that EFL 24 mm works best for the landscapes with the Milky Way.
-
Don’t think that expensive camera is a recipe for success. You’ll see in this post my astrophotos made with Samsung NX mini and Canon 550D, not that expensive cameras. The photos are not perfect, but the sky quality is decent.
Photo processing #
Finally, we came to the most important part — photo processing. In astrophotography I like the fact that during the night you can be relatively relaxed and stargaze lying on the ground next to your shooting camera. The main work starts at home.
IRIS installation & setup #
-
Download IRIS. No need to install current version (5.59), just unpack it. Works fine with Windows 7.
-
Run iris.exe. In
File → Settings:- set Working path, IRIS will use it for temporary files (it might grow as big as 5 GB and even greater),
- choose PIC in File type.
-
Hit the camera button (third from right):

- choose your camera in Digital camera. For Canon 6D I choose
CANON (50D/5Dmk2/7D). If there is no your camera in the list, you need first to convert RAW files to DNG and choose ADOBE DNG from list. It can be done with LightRoom or free tool Adobe DNG Converter. - choose Gradient in RAW interpolation method.
- choose your camera in Digital camera. For Canon 6D I choose
Load the files #
-
Load light series: Digital Photo → Decode RAW Files… IRIS window will hide after this. You can drag and drop now the light series. Type into the field Name:
light, hit the button->CFA..., when conversion is finished, hitDone. -
Load dark series: Digital Photo → Decode RAW Files… Drag and drop the dark series. Type into the field Name:
dark, hit the button->CFA..., when conversion is finished, hitDone. -
Load offset series: Digital Photo → Decode RAW Files… Drag and drop the offset series. Type into the field Name:
offset, hit the button->CFA..., when conversion is finished, hitDone.
Create offset, dark and flat maps #
-
Create an offset. Digital photo → Make an offset… In the field Generic name: type in
offset, in the field Number: type in the number of frames you’ve downloaded. Open console window by hitting the button and type in there
 >save offset. Make sure to type in>, otherwise command won’t work. After thisoffset.picwill be created in your Working path. -
Create a dark map. Digital photo → Make a dark… In the field Generic name: type in
dark, in the field Offset image: type inoffset, in the field Number: type in an amount of dark frames you’ve downloaded. Choose MethodMedian. Type in>save darkin the console. -
Create a cosmetic file (optional). Type in the console:
>find_hot cosme 600. Number is a threshold (you’ll probably need to change it).Hot pixels number: 100will appear in the Output window (number is from 0 to 10000). This way I ask IRIS not to take into account 100 «hottest» pixels out of ~20 millions (for Canon 6D). -
Create a flat-field map in the same manner (Digital photo → Make a flat-field…). If you didn’t shoot flat frames, just type in the console:
>fill 10000and then>save flat.
Preprocessing #
-
Load the first frame from the light series from the console:
>load light1. Select a part of sky without stars and bright stars and go to Digital photo → Preprocessing → field Input generic name:light, field Offset:offset, field Dark:dark, field Flat-field:flat, Cosmetic file:cosme, Output generic name:proc, Number: amount of frames in light series. Check a checkbox Optimize. -
Convert your files to RGB: Digital photo → Sequence CFA conversion, field input:
proc, field output:rgb, Number: amount of frames in light series. Output files type:Color.
Registering images #
- The moment of truth: register images
>load rgb1, Processing → Stellar registration, Input generic name:rgb, Output generic name:reg, Number: amount of frames in light series. Method: try Global matching, don’t check Select a zone, Transformation:Cubic. That means that IRIS will try to register everything: landscape and sky, so it will have to distort the image. It make took couple of minutes or dozens of minutes.
Stacking images #
-
Images are registered, now we can stack it. Type in the console:
>add_norm reg 10, type in amount of frames in light series instead of 10.If registration was not perfect, you may see 10 stars instead of one. It happens more often with very wide-field lenses. One way of dealing with it is the following: type in the console
>load rgb1again, select a zone to register by dragging over the photo, Processing → Stellar registration, Method: Global matching, check the checkbox Select a zone. Then do>add_norm reg 10and check out the result. Stacking should be good at least inside the zone you’ve selected. In principle you can do it 6 times for 6 different zones and then combine these 6 images with masks in GIMP/Photoshop, but it requires a lot of time. Once I did it. -
If stacking is not good only in a minor part of the resulting image, you can stack frames using not the arithmetic mean (as add_norm does) but using median law:
>smedian reg 10. Then bad registered stars will just disappear. Sometimes it is an acceptable workaround for poorly registered images.
Set the color #
-
Select dark part of the sky around 50×50 pixels and type in the console:
>black. -
To set the correct white balance you should select a solar-type star (only a star without a sky!) and type in the console:
>white. You can just try different stars until you get something decent. Or you can find a G2 star in Stellarium. Identify the part of the sky in your image, find it in Stellarium and click on the stars, this will show a spectral type of the star. The spectral class gives an objective measure of the star’s photosphere temperature. For Sun and other G2 stars this value is about 5800 K. -
Adjust levels, moving the thumbs in the Threshold window. Watch to avoid over- and underexposured regions.
Save the result #
File → Save...I usually use bmp. Tif is preferable but I cannot read the result.tif for some reason.
Additional processing in photo editor #
- Open in layers your result and a landscape. One thing I do first in PS: auto color correction, usually it makes color better. Then combine layers using masks and gradient and/or brush tool. Apply unsharp mask if you want. Increase or decrease the saturation if needed.
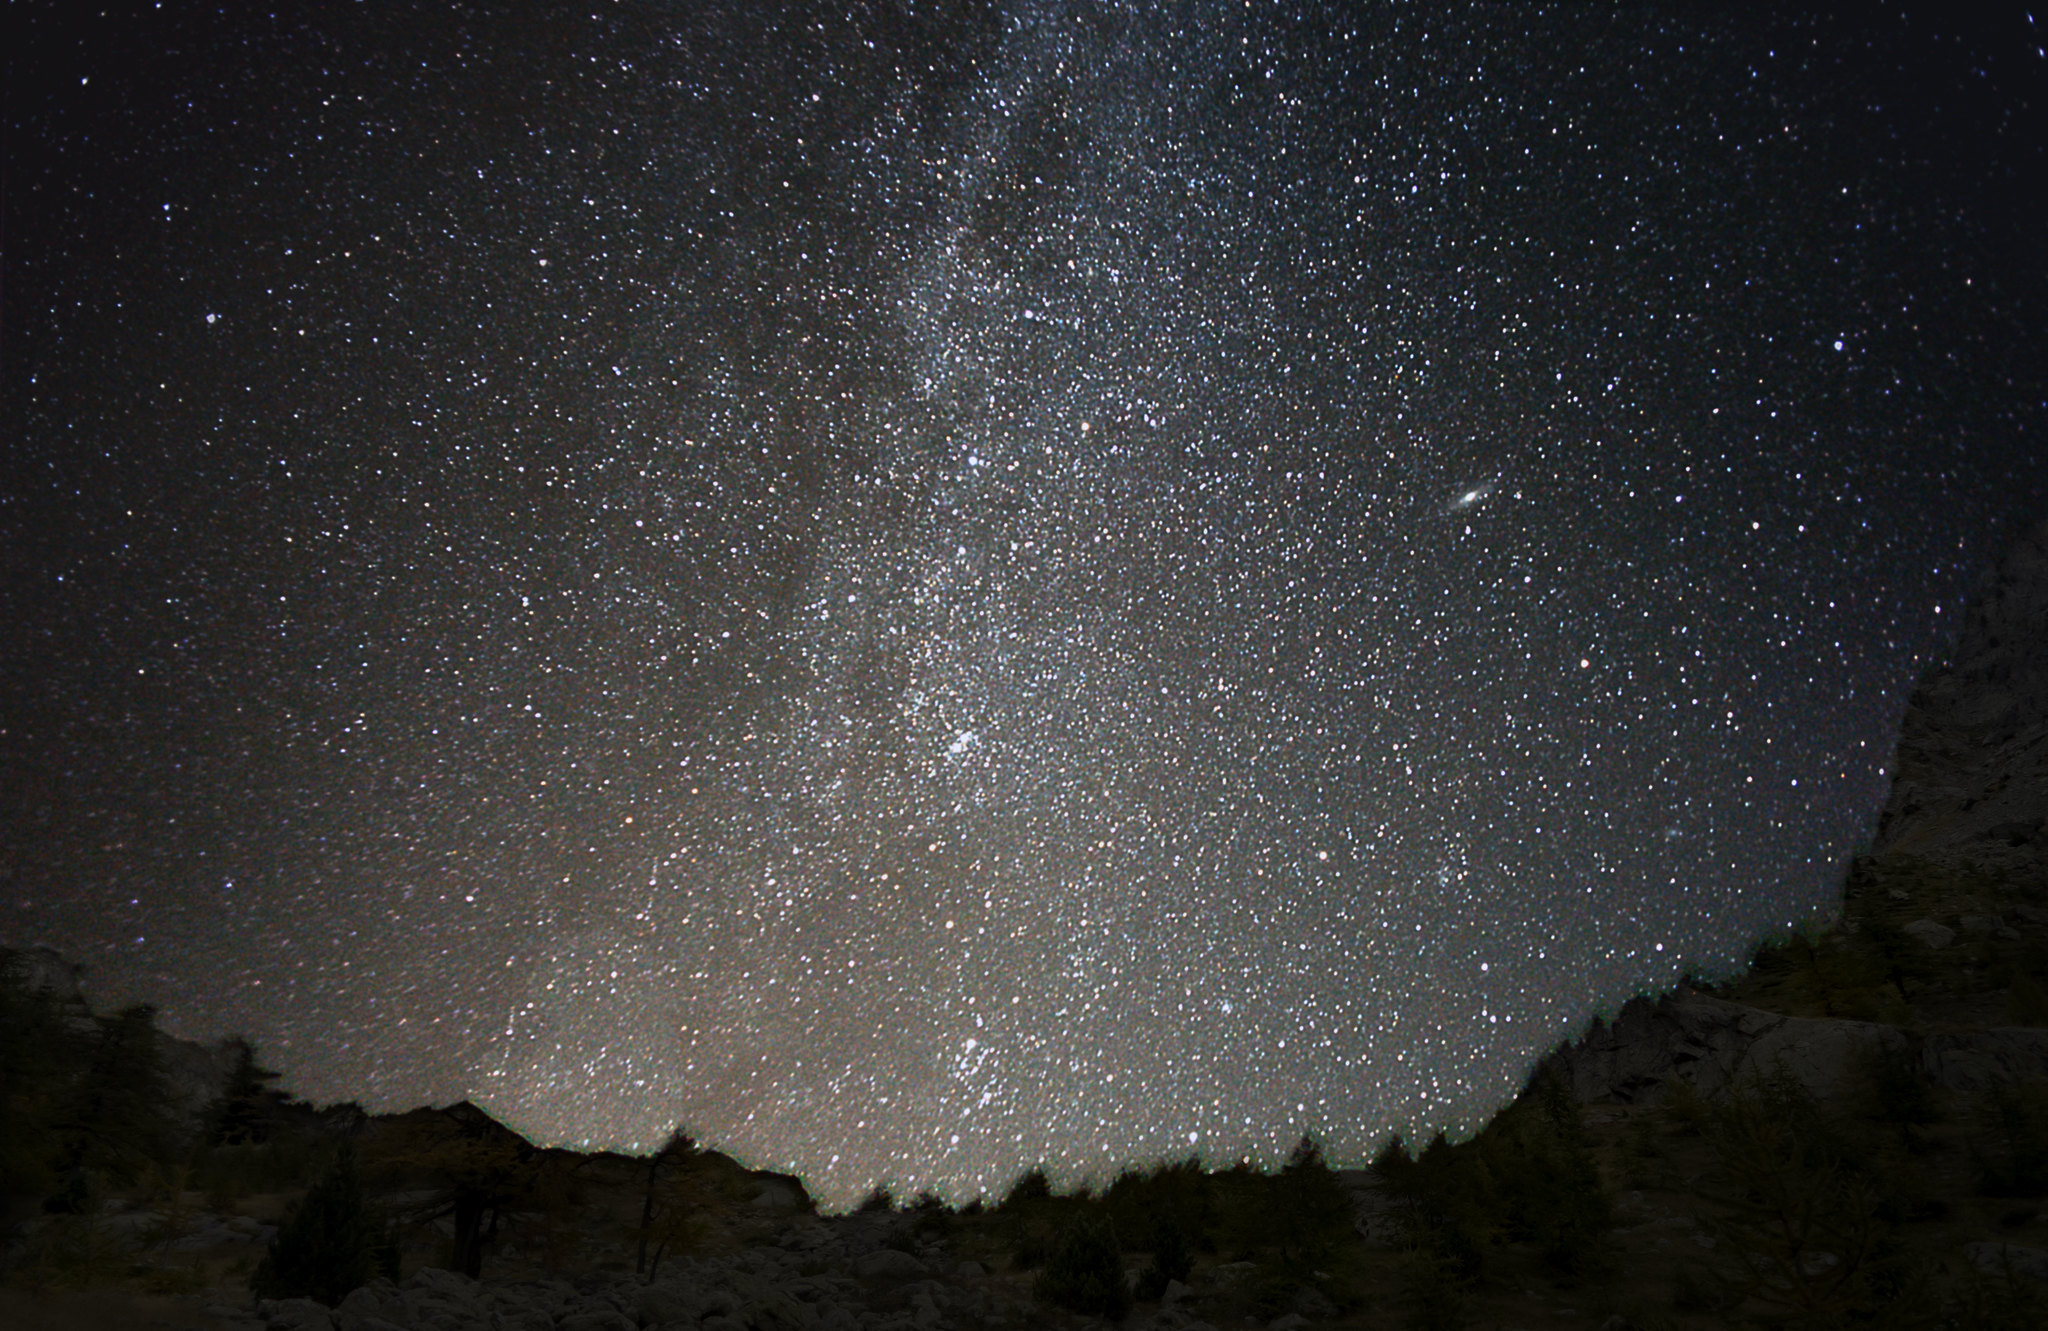
My astrophoto examples #
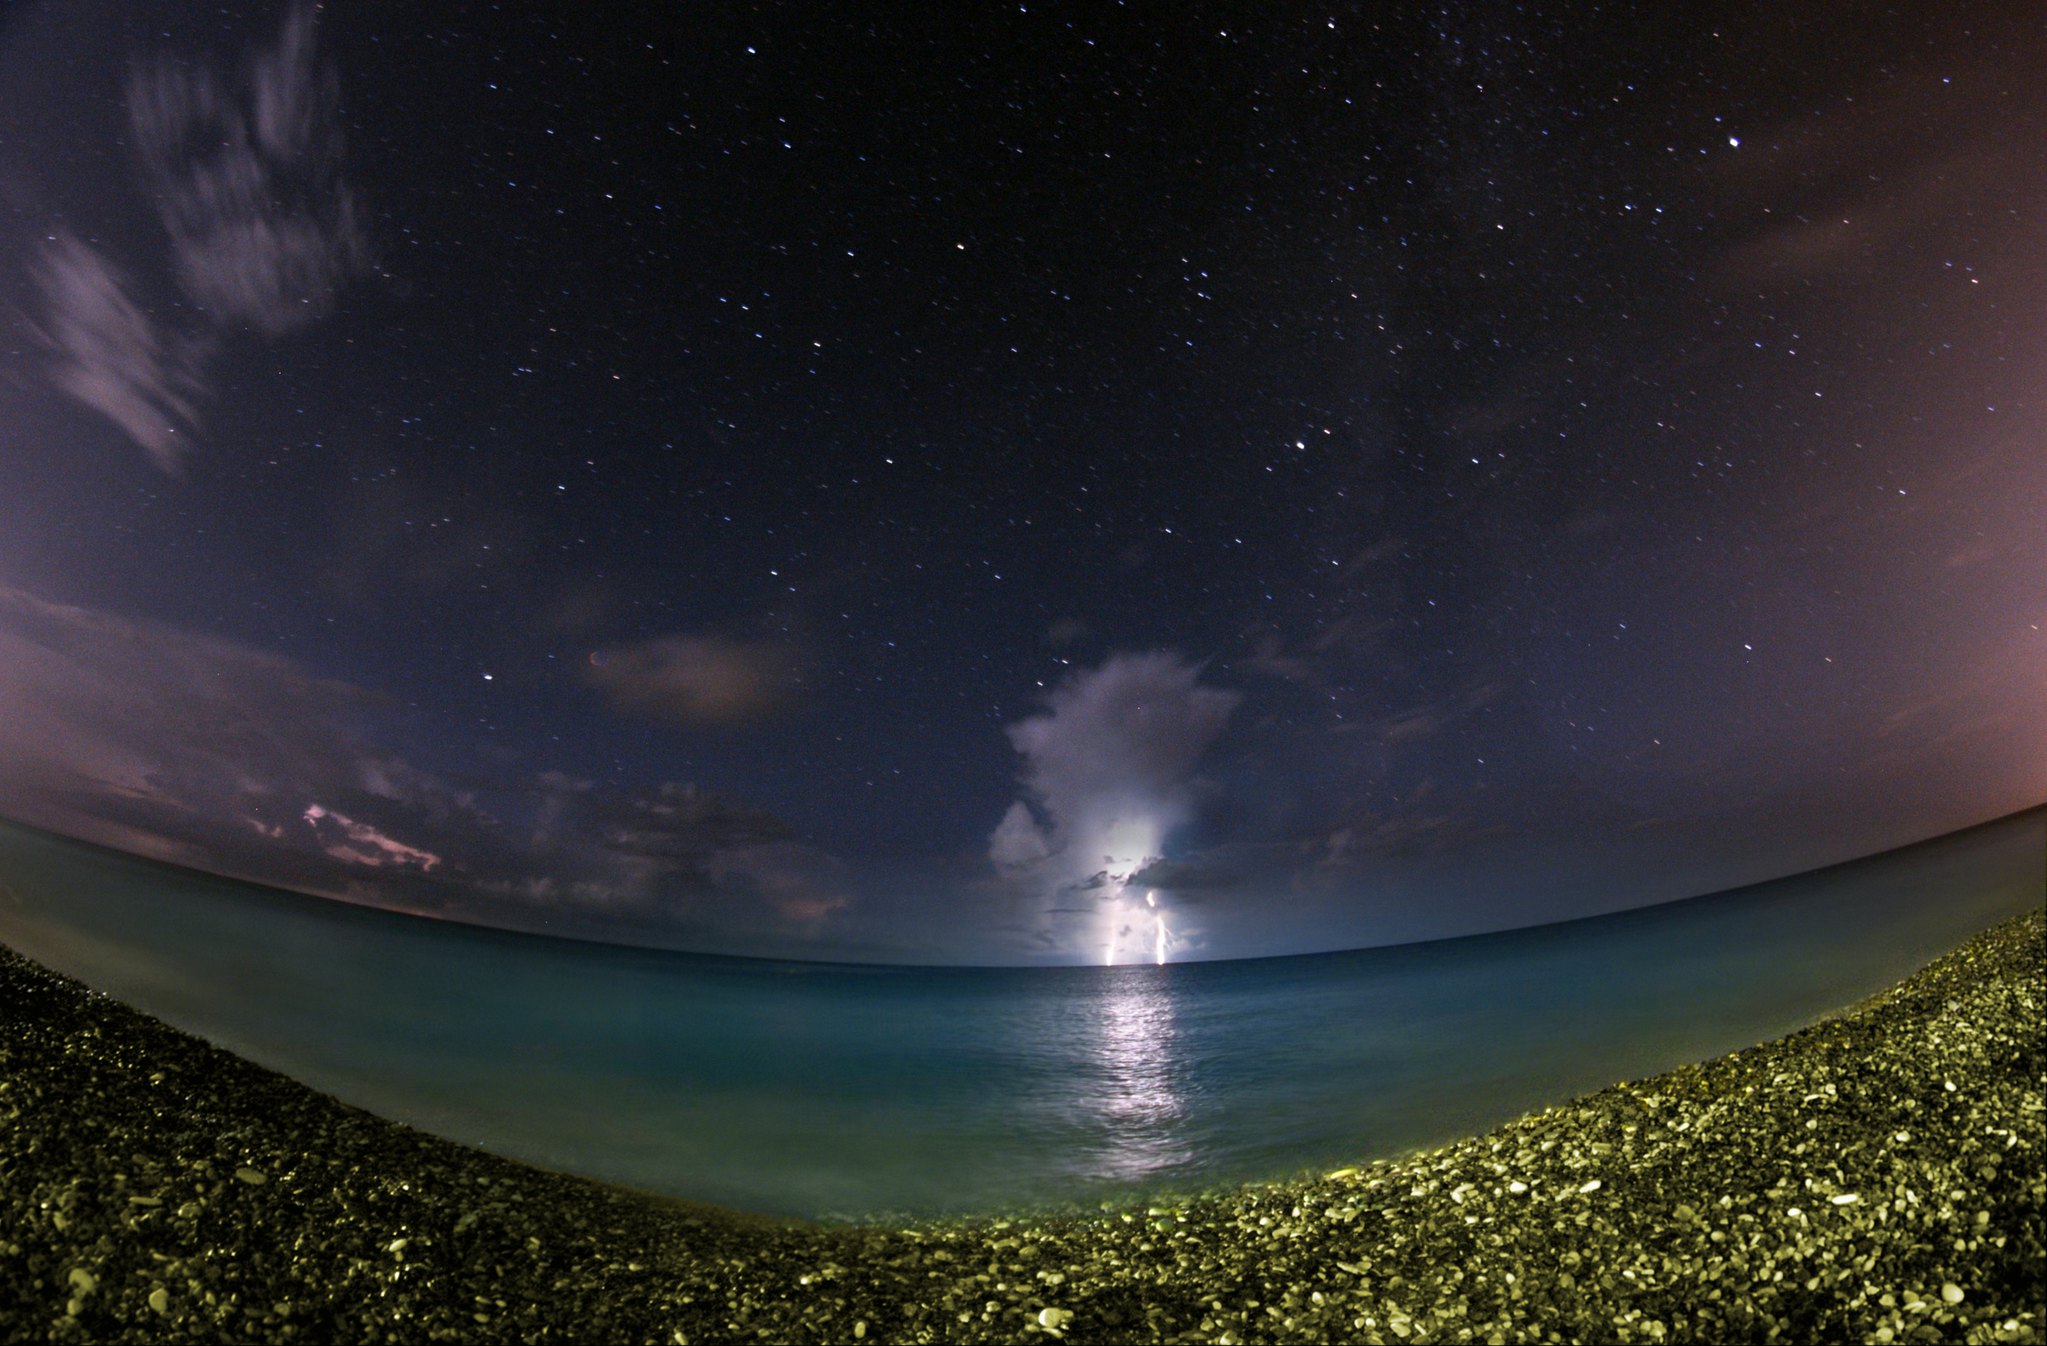
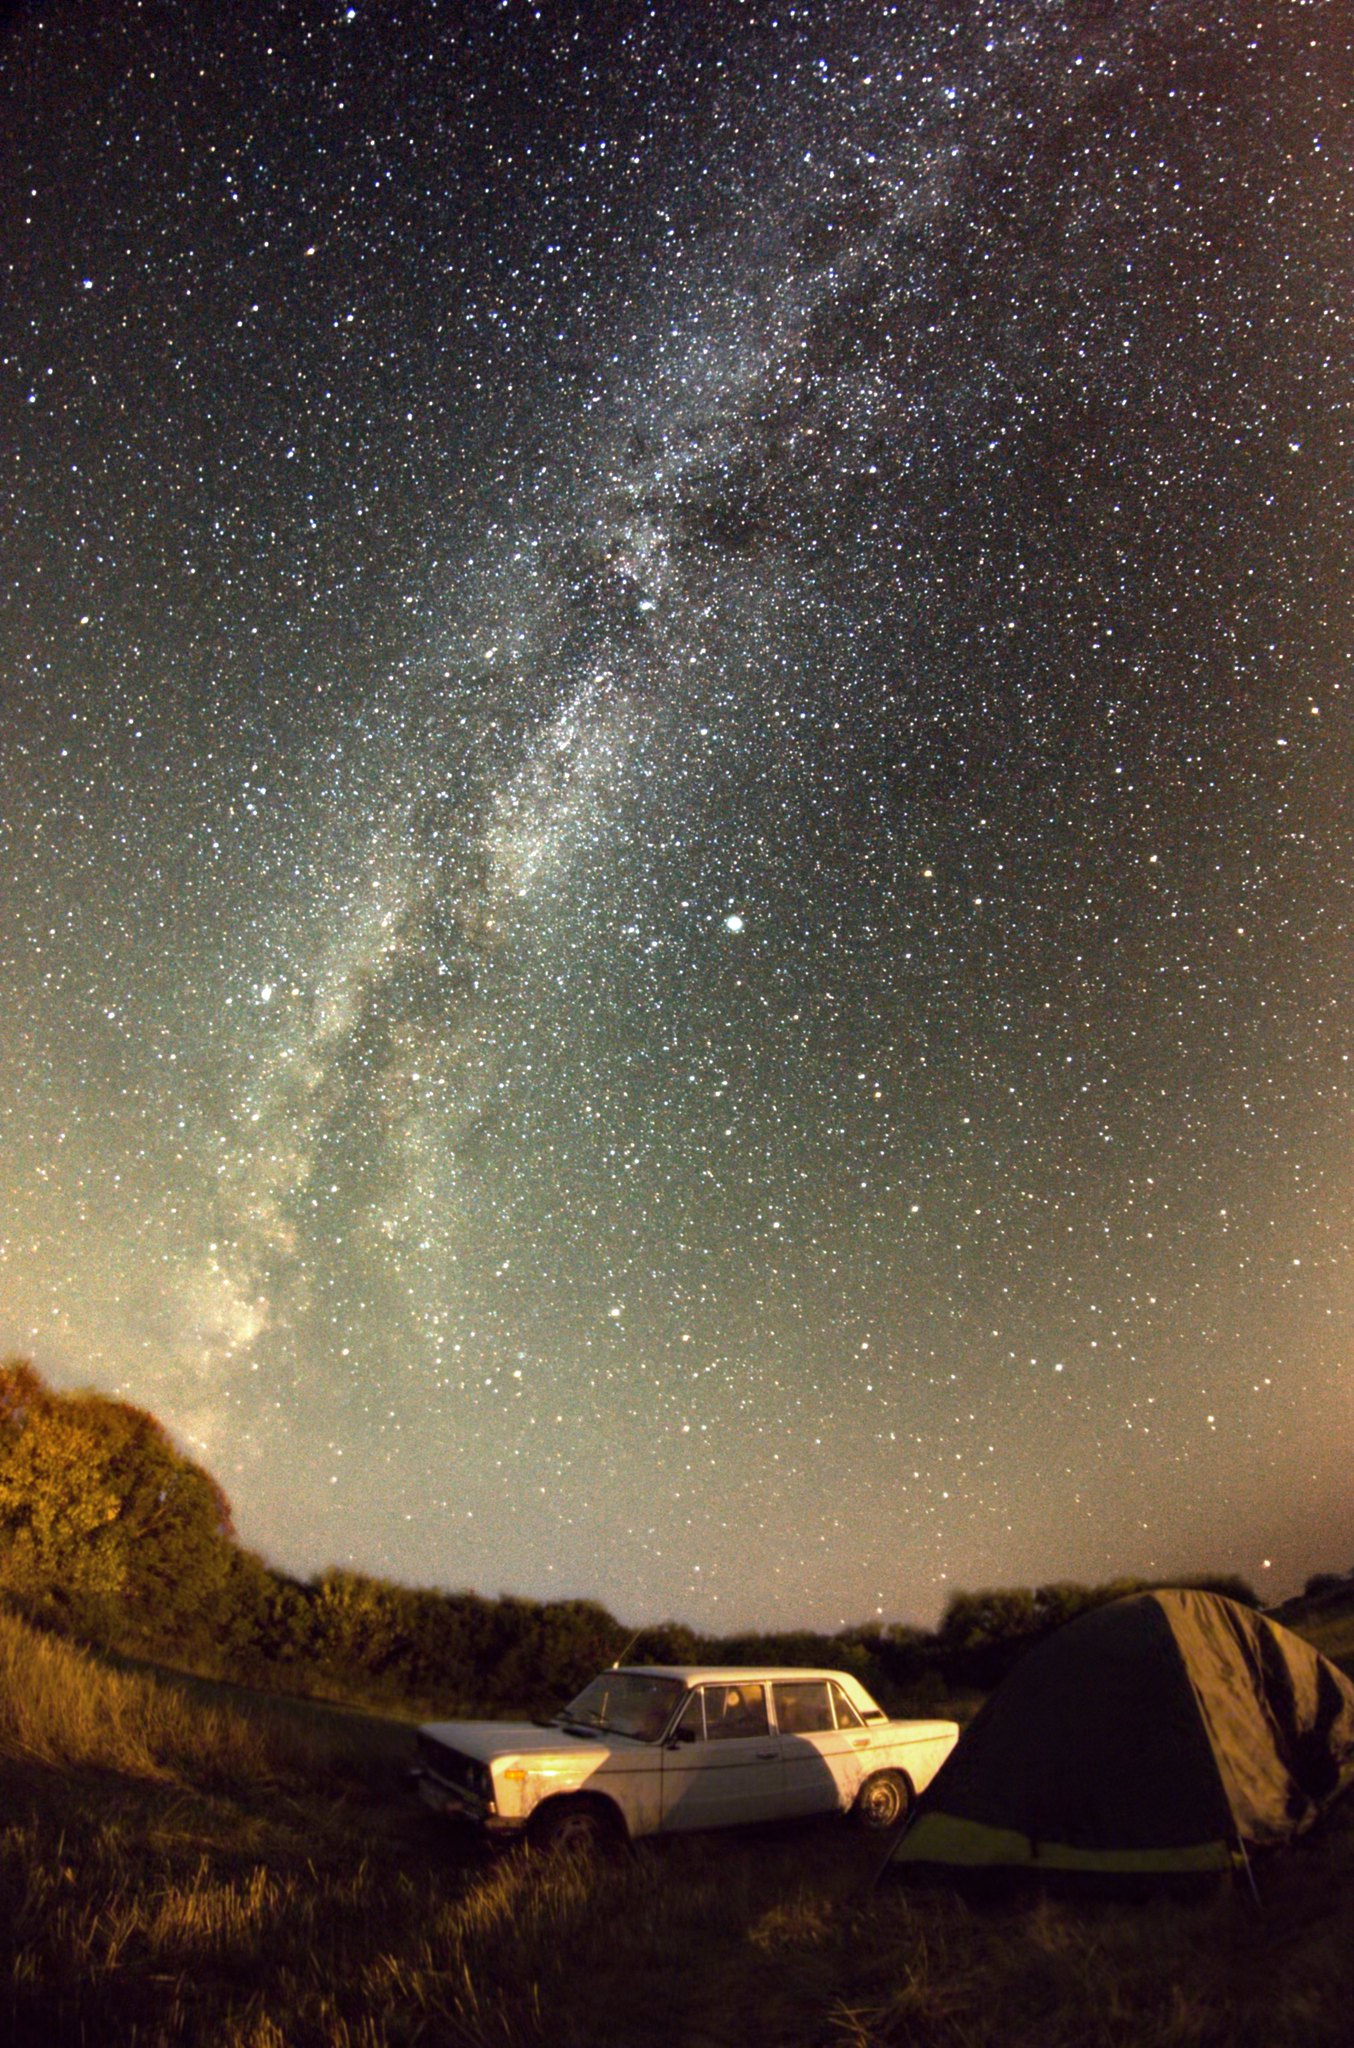
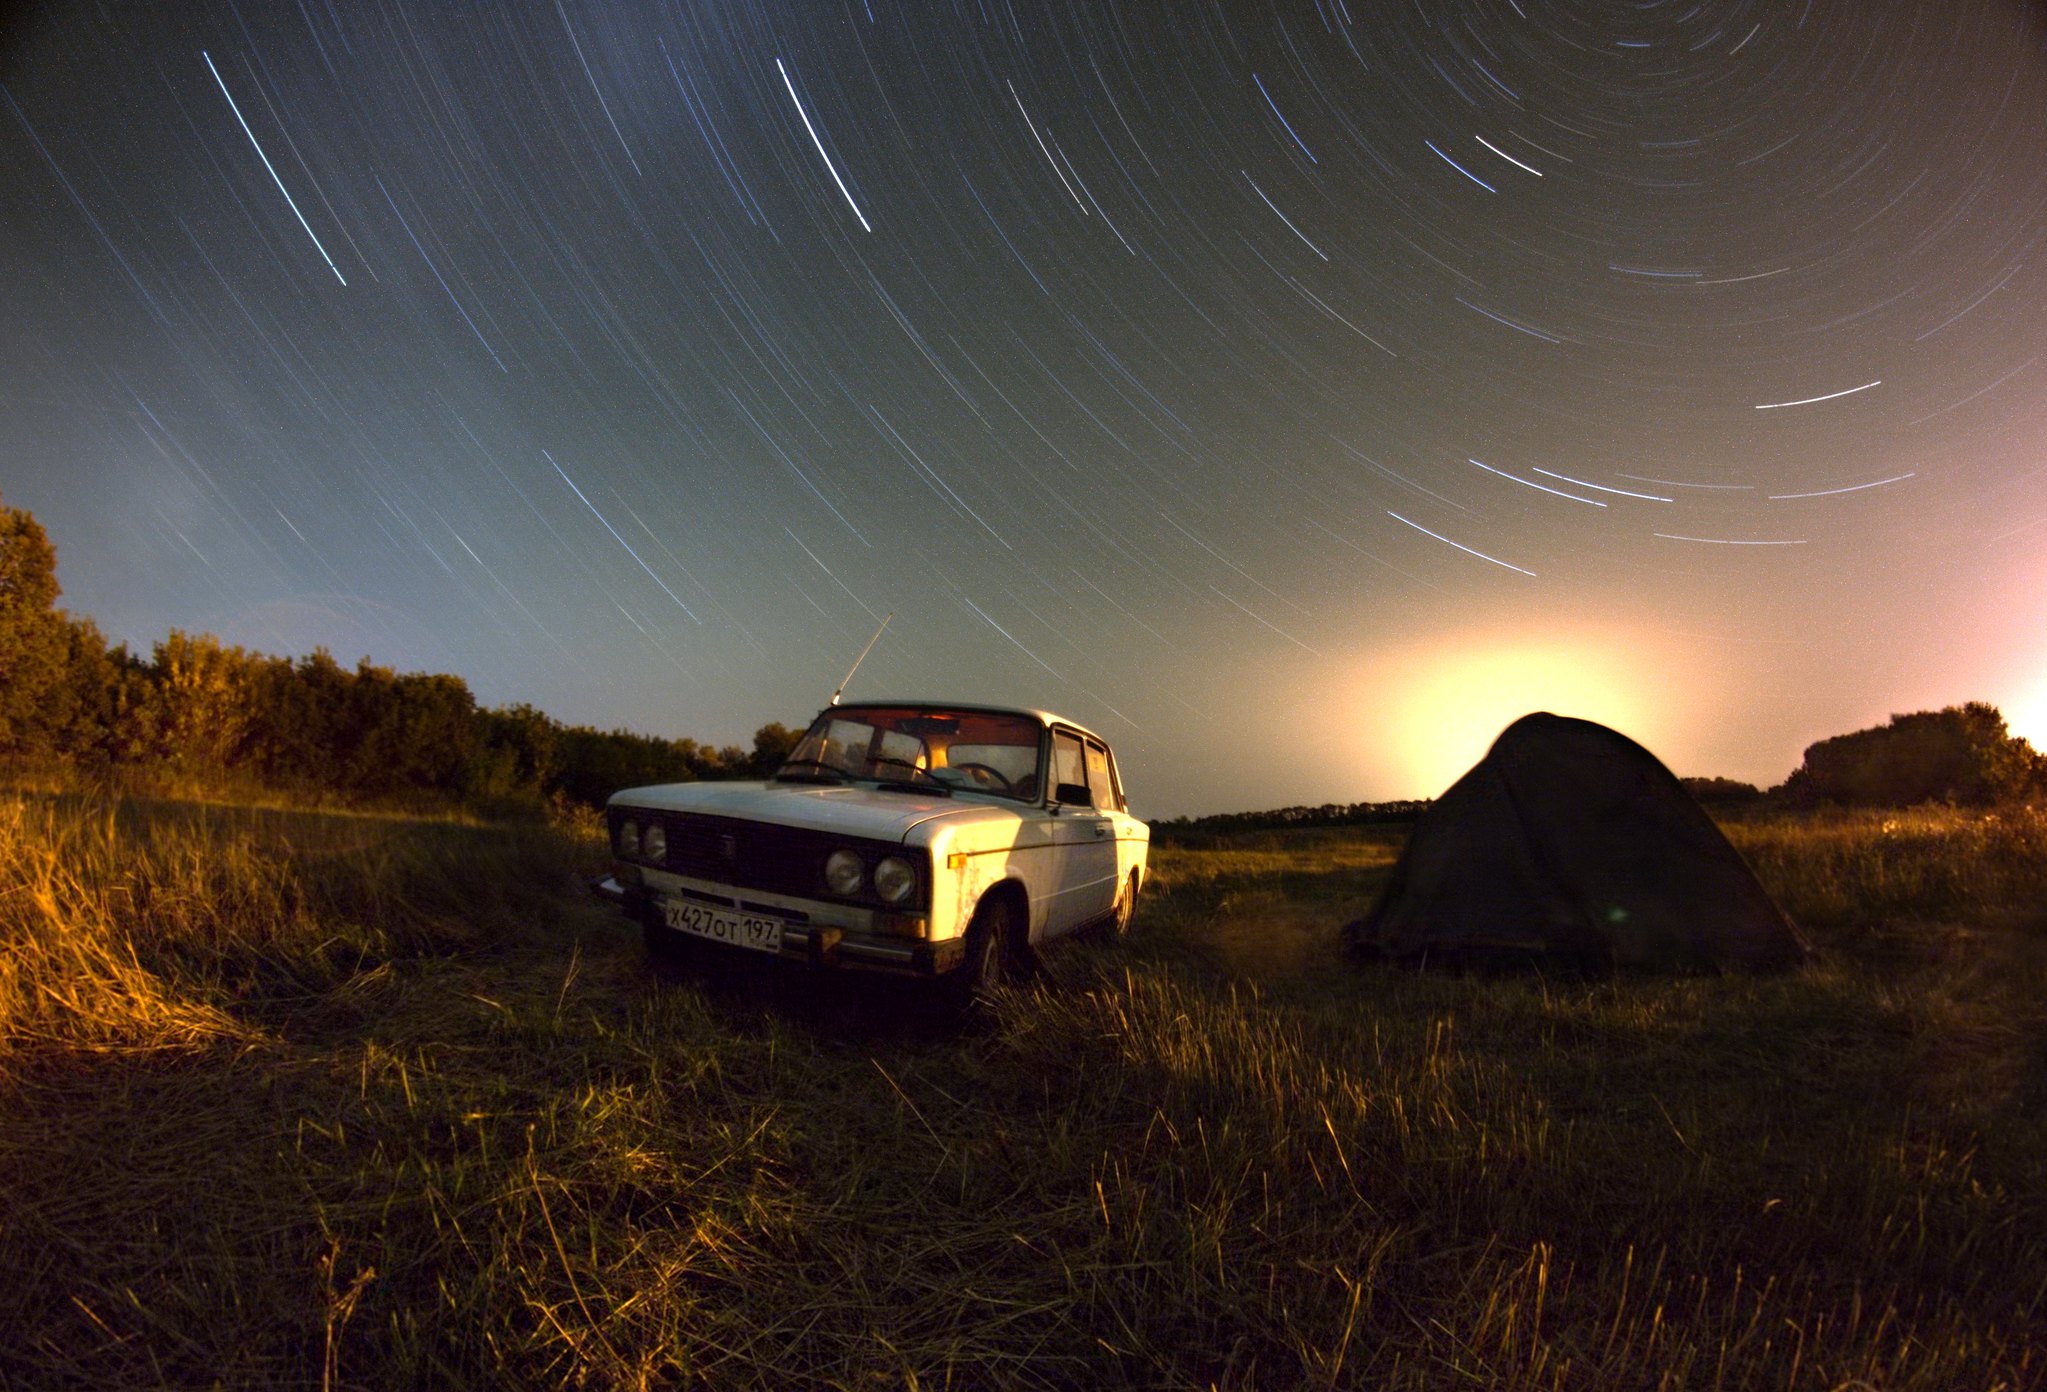
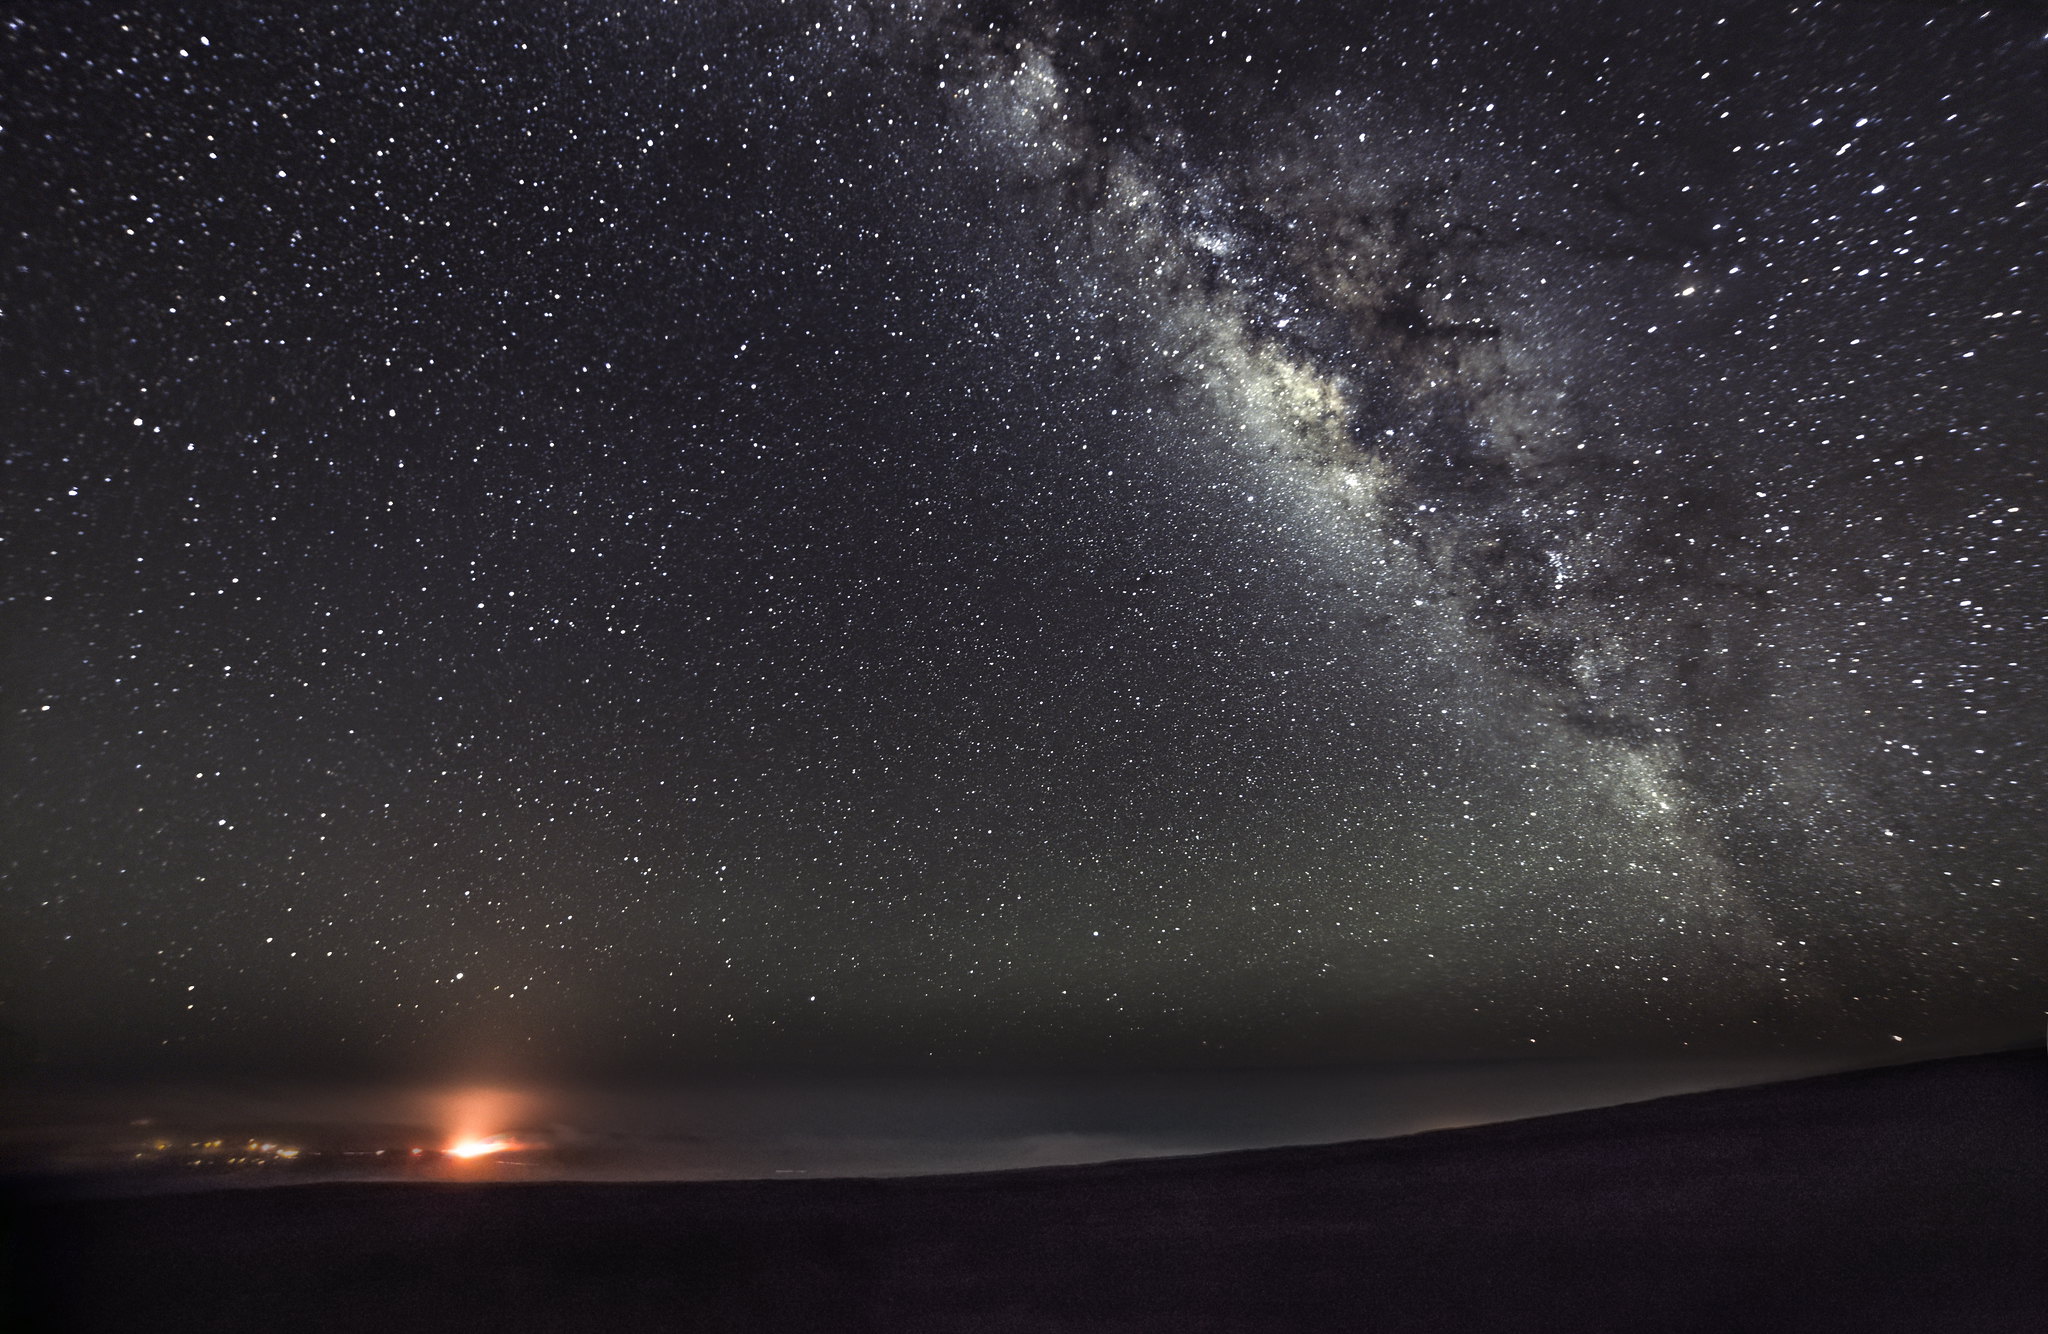
In these examples you can see that IRIS can be used in very different ways. E.g., If you stack images without registering, you’ll have startrails. If you shoot the thunderstorm, you can stack images and obtain result with lightnings from different frames in one image. Don’t be afraid to experiment! In this post I told you only about 5% of IRIS capabilities. Learn more on the official website.
Originals are available at album.
The end #
Please don’t think that this tutorial covers everything. It is a good idea to have a look on the tutorial at the official website. Check out DeepSkyStacker — a freeware similar to IRIS. It works with the same light, dark, offset series as IRIS. Working with DSS is more intuitive.
I’ll be glad to answer your questions.
Good luck with shooting!